
Hello friends, now i'm gonna show you how to make a FOLDED paper effect to your text and a 3D effect to it. You can use this in your pics to make them look much better.
Create a new file(ctrl+n). You can add a gradient effect to it.

Select the Horizontal text type tool and select origram font. You can download this font from https://dribbble.com/shots/1077232-ORIGRAM-Free-Font

Now type in the text. You can align the text by selecting text layer and Background layer, then select move tool and align it using transform controls.

Rasterize the text layer to apply some effects to the layer(Only text layer should be selected).
Go to Layer -> Rasterize -> Type

To make the folded effect to the letter f, select a portion of it as shown using Rectangular Marque Tool (Only text layer should be selected)

Now select the Burn Tool

Set the Exposure to 100% and apply it in the selected area such that it should look like this


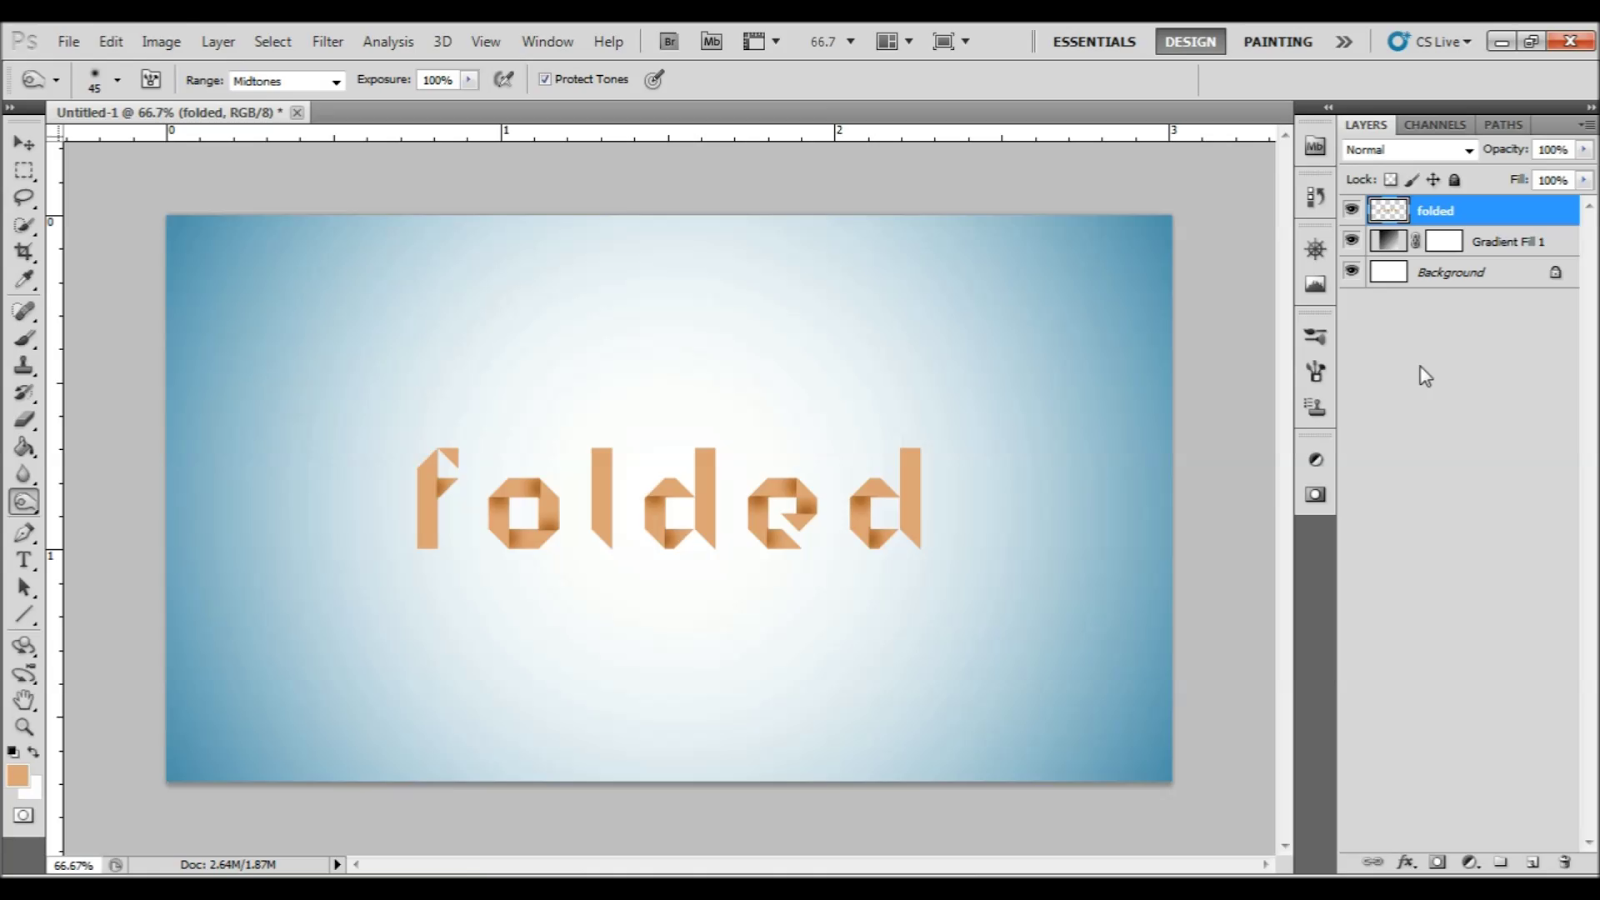
Apply this to all letters by selecting a part of the letter and applying Burn tool effect to those. After applying effects to all letters it looks like this.
Now let us add a 3D effect to it by creating a New Layer which contains shadows of all letters.
Select Eclipse Tool from the tool box and draw a eclipse under f and fill it with black color.

Draw these for all letters and align them using Transform controls

To bring an awesome effect to the shadow layer, first merge all the layers.

Then apply Gaussian Blur effect to this layer to make it realistic.
Go to Filter -> Blur -> Gaussian Blur

Set the radius as you required. Here i'm setting it to 10 pixels and click ok. Then you will get this.

You can also reduce the opacity. Here is the outlook of what we have created.
Add these effects to your photo so that they look much better. Thank you :) Any queries leave a comment.
No comments:
Post a Comment